


















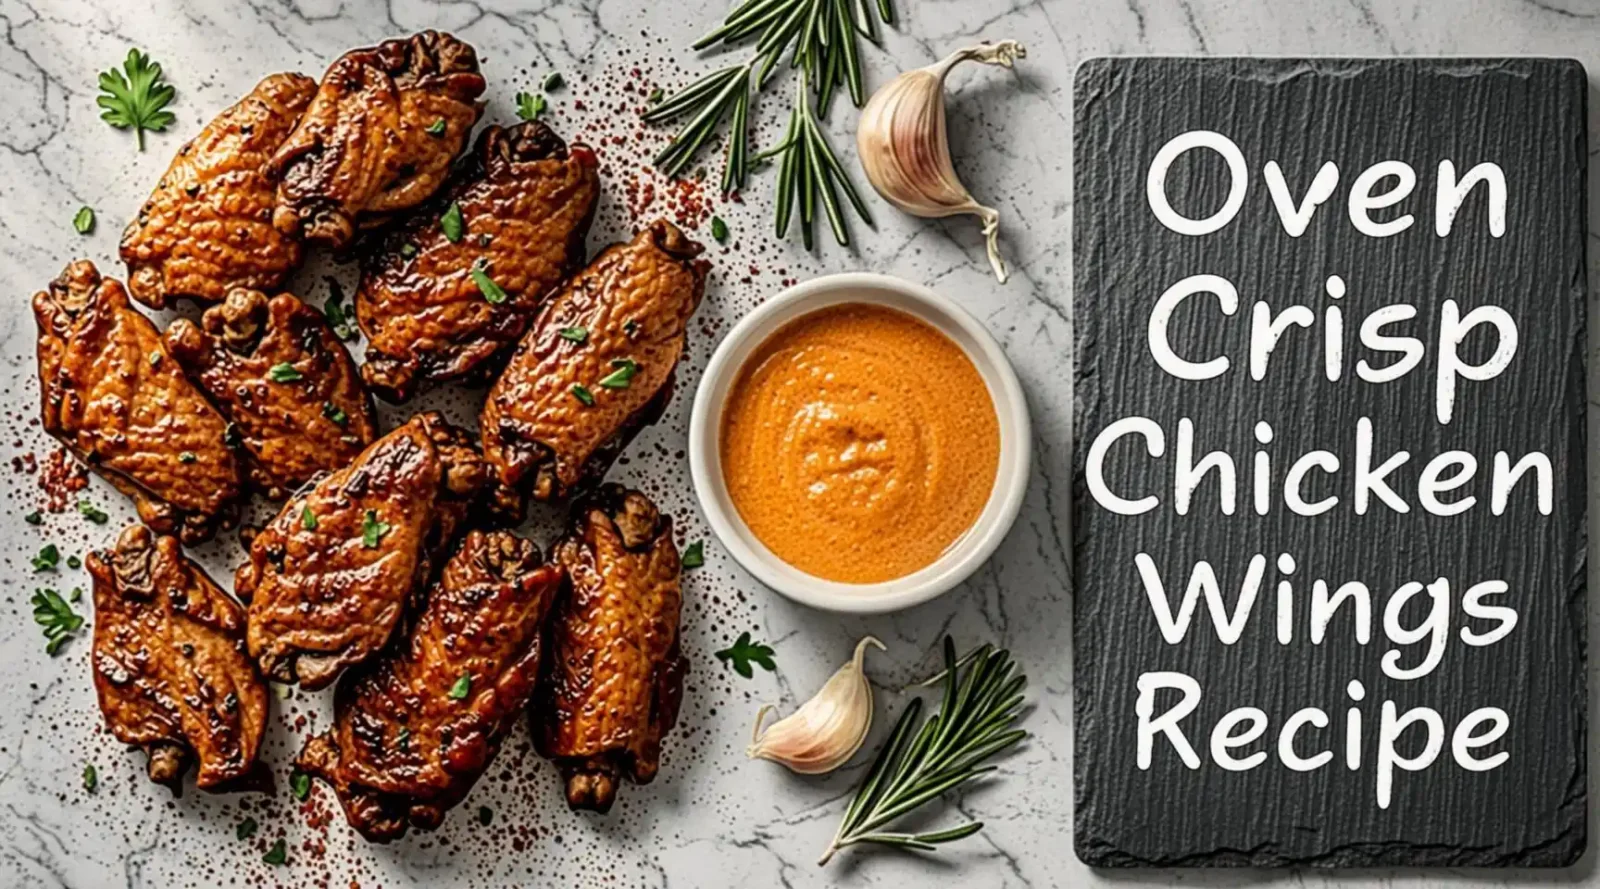
The Ultimate Oven‑Crisp Chicken Wings Recipe
Your step‑by‑step guide to perfectly crispy, juicy wings without the deep‑fryer
🔥 Meta Description
Discover how to create irresistibly crispy, golden‑brown chicken wings in the oven with our fool‑proof recipe, pro tips, and flavor variations for every palate.
📌 Quick Look‑Up Summary
| Section | What You’ll Learn |
| Why the Oven? | Healthier cooking, easy cleanup, and reliable crispness |
| Ingredient List | Full pantry rundown for classic, spicy, and garlic‑parmesan wings |
| Equipment Essentials | Tools that guarantee a uniform, crunchy crust |
| Step‑by‑Step Method | From prepping to broiling—exact times, temperatures, and techniques |
| Pro Tips & Troubleshooting | Avoid soggy wings, achieve a perfect crunch, and store leftovers |
| Flavor Variations | Customizable rubs, sauces, and coating ideas |
| Serving & Pairing Ideas | Side dishes, dips, and drink pairings for a complete feast |
| FAQ | Answers to the most common wing‑related questions |
| Disclaimer | Nutritional info and safety notes |
- Why Bake Your Wings Instead of Frying?
If you’ve ever tried to deep‑fry chicken wings at home, you know the ritual: oil heating, splatter, and the lingering smell that clings to kitchen curtains for days. Oven‑baking offers a healthier and more convenient alternative while still delivering that coveted crispy chicken wings texture we all love.
| Benefit | Oven‑Baked Wings | Deep‑Fried Wings |
| Calorie Count | 30‑40% fewer calories (less oil absorption) | Higher calories due to oil |
| Fat Content | Reduced saturated fat | Higher saturated and trans fats |
| Cleanup | One sheet pan + optional cooling rack | Large pot of hot oil & splatter |
| Safety | No hot oil to mishandle | Risk of burns & kitchen fires |
| Scalability | Cook 2‑3 dozen at once on multiple racks | Limited batch size per pot |
When you combine high heat (425‑450°F) with a dry‑heat environment, the skin dehydrates just enough to create that signature crunch without the need for a vat of oil. The result is a healthy wing recipe that satisfies cravings and fits better into balanced meal plans.
- Ingredients – The Core of Your Crispy Success
Below is the complete ingredient list for the classic version. Feel free to substitute or add any of the flavor variations listed later.
2.1 Core Ingredients
| Amount | Ingredient | Why It Matters |
| 2 lb (≈ 900 g) | Chicken wing flats & drumettes (preferably fresh, not frozen) | Fresh wings retain moisture; frozen can be used if fully thawed and patted dry |
| 2 tbsp | Olive oil (or avocado oil) | Helps the skin brown and the seasoning adhere |
| 1 tbsp | Baking powder (aluminum‑free) | Raises the pH, dries the skin, and creates a crisper crust |
| 1 tsp | Kosher salt | Enhances flavor and draws moisture from the skin |
| ½ tsp | Black pepper (freshly cracked) | Adds subtle heat and complexity |
2.2 Optional Seasoning Mix (Classic Flavor)
| Amount | Ingredient |
| 1 tsp | Smoked paprika |
| ½ tsp | Garlic powder |
| ½ tsp | Onion powder |
| ¼ tsp | Cayenne pepper (adjust to taste) |
| ¼ tsp | Dried thyme or oregano (optional) |
2.3 Flavor‑Boosting Variations
| Variation | Additional Ingredients |
| Spicy Chicken Wings | 2 tbsp hot sauce + 1 tsp honey (for a sweet‑heat glaze) |
| Garlic Parmesan Wings | 3 tbsp melted butter + ¼ cup grated Parmesan + 2 tsp garlic powder |
| Lemon‑Herb Wings | Zest of 1 lemon + 1 tbsp fresh rosemary, minced |
| Asian‑Inspired | 2 tbsp soy sauce + 1 tbsp honey + 1 tsp sesame oil + 1 tsp ginger powder |
| BBQ‑Bourbon | ¼ cup BBQ sauce + 2 tbsp bourbon + 1 tsp smoked paprika |
Tip: Keep a small bowl of wing seasoning (your chosen mix) handy. Toss the wings in the seasoning after they’ve baked for the first 20‑minutes, then finish the remaining time uncovered. This two‑step seasoning locks in flavor and texture.
- Equipment Checklist – Set Up for Success
| Tool | Purpose |
| Baking sheet (rimmed) | Catches drippings; prevents smoke |
| Wire cooling rack (oven‑safe) | Elevates wings for air circulation; essential for crispness |
| Large zip‑top bag or bowl | For mass‑tossing wings with oil & seasoning |
| Instant‑read thermometer | Checks internal temperature (165°F safe) |
| Tongs | Flipping without tearing skin |
| Paper towels | Patting wings dry for optimal crisping |
| Silicone brush (optional) | Drizzle glaze uniformly |
If you lack a cooling rack, improvise with a grid of aluminum foil folded into a shallow “spider” shape—just ensure it’s stable and doesn’t sag under the wings.
- The Fool‑Proof Method – Step‑by‑Step
Below is the detailed workflow that yields restaurant‑grade crispy chicken wings every time.
4.1 Prep the Wings
- Dry thoroughly – Pat each wing completely dry with paper towels. Moisture is the enemy of crispness.
- Season the skin – In a large zip‑top bag, combine olive oil, baking powder, kosher salt, and pepper. Toss the wings until every surface is lightly coated.
Why the baking powder? It raises the pH of the skin, breaking down proteins and allowing moisture to evaporate faster, which results in a golden, crunchy exterior. - Rest (optional) – For the ultimate crunch, spread the coated wings on a rack and refrigerate uncovered for 30‑60 minutes. This step further dries the skin.
4.2 Preheat & Arrange
- Preheat oven to 425°F (220°C). Position an oven rack in the middle and another rack on top for a second pan if cooking a large batch.
- Line a baking sheet with parchment or a silicone mat. Set the wire cooling rack on top.
- Arrange wings in a single layer on the rack, leaving at least ½‑inch space between each piece. Overcrowding traps steam and yields soggy results.
4.3 First Bake – The Crunch Build‑Up
- Place the sheet in the oven and bake 20 minutes.
- Flip each wing using tongs; this ensures even browning on both sides.
- Bake for an additional 15‑20 minutes, or until the skin is a deep, uniform golden brown. The internal temperature should read 165°F (74°C).
4.4 Optional Sauce Finish
If you’re using a glaze (e.g., hot sauce, BBQ, or garlic butter), now is the time to apply it:
- Remove the wings from the oven and transfer to a large bowl.
- Toss with your prepared sauce until fully coated.
- Return to the rack and broil on high for 2‑3 minutes. Watch carefully—sauces with sugar can burn quickly.
Result: You’ll have wing skins that are crispy on the outside but tender and juicy within, with a flavorful glaze that clings without sogging.
4.5 Final Rest
Let the wings rest for 5 minutes before serving. This allows the juices to redistribute, preventing a sudden burst of steam when bitten into (which would otherwise soften the crust).
- Pro Tips & Common Pitfalls
| Issue | Why It Happens | Fix / Prevention |
| Wings turn soggy | Skin not dry enough; oil pooling on rack | Pat dry, use baking powder, and ensure rack elevation |
| Uneven browning | Overcrowding or uneven rack placement | Spread wings out, rotate pan halfway through baking |
| Skin cracks or flakes | Excessive baking powder or over‑baking | Use only 2 tbsp per 2 lb wings, keep watch after 35 min |
| Flavor loss after baking | Seasonings evaporate with steam | Apply a second coat of seasoning after the first bake |
| Burnt sauce | High sugar content; broiling too long | Thinner glaze, watch vigilantly, broil 1‑minute intervals |
| Wings dry out | Overcooking past 165°F | Use instant‑read thermometer, remove promptly |
Bonus Hack: Sprinkle a light dusting of cornstarch (½ tsp) with the seasoning mix for an extra snap. Cornstarch absorbs surface moisture, acting like a micro‑breaded coating without actual breading.
- Flavor Variations – From Mild to Wild
Below are three complete recipe outlines you can copy‑paste into your kitchen notebook.
6.1 Classic Crispy Wings (baseline)
- Follow the core ingredient list.
- Use the Classic Seasoning Mix (smoked paprika, garlic & onion powder).
- No glaze; serve with ranch or blue‑cheese dip.
6.2 Spicy Honey‑Garlic Glazed Wings
- Glaze: ¼ cup honey, 2 tbsp hot sauce (e.g., Sriracha), 1 tsp minced garlic, 1 tsp soy sauce.
- After first bake: Toss wings in glaze, return to oven, broil 2‑3 min.
- Garnish: Chopped scallions and toasted sesame seeds.
6.3 Garlic Parmesan Crispy Wings
- Butter mixture: 3 tbsp melted butter, 2 tsp garlic powder, ¼ cup grated Parmesan, pinch of parsley.
- Post‑bake: Coat wings, sprinkle with extra Parmesan, and bake 3‑4 min at 400°F to set the crust.
- Serve with a side of lemon wedges.
Feel free to experiment by swapping herbs, swapping smoked paprika for chipotle powder, or adding a dash of coconut aminos for a gluten‑free Asian twist.
- Pairings & Presentation
| Category | Suggestions |
| Dip | Classic ranch, blue‑cheese, creamy sriracha, honey mustard, or a tangy lime‑cilantro yogurt sauce |
| Side | Celery sticks, carrot batons, pickled jalapeños, roasted sweet‑potato wedges, or a crisp coleslaw |
| Beverage | Light lager, crisp pilsner, IPA for heat lovers; sparkling water with lemon for a non‑alcoholic option |
| Garnish | Fresh herbs (parsley, cilantro), toasted sesame seeds, lime wedges, or a drizzle of extra glaze |
Serving Idea: Arrange wings in a large wooden board, nestle dips in small ramekins, and scatter fresh herbs for visual pop. The board becomes a centerpiece at game nights, BBQs, or casual dinner gatherings.
- Frequently Asked Questions
Q1: Can I use frozen wings?
A: Yes—thaw completely, then pat dry. Frozen skins contain extra ice crystals, so an additional 5‑10 minutes of drying time helps.
Q2: Why does the recipe call for baking powder instead of flour?
A: Baking powder raises the pH, allowing the proteins in the skin to break down and release moisture, which creates a dry, crackly surface. Flour merely adds thickness; it won’t achieve the same crisp without deep‑frying.
Q3: Do I have to use a cooling rack?
A: A rack is the easiest way to ensure air circulates around each wing. If you skip it, flip the wings every 10 minutes and consider using a convection oven to mimic the airflow.
Q4: How long can I store leftovers?
A: Refrigerate in an airtight container for 3‑4 days. To re‑crisp, place them on a baking sheet and broil 2‑3 minutes or reheated in a pre‑heated 400°F oven for 8‑10 minutes.
Q5: Can I make a dry rub instead of a wet glaze?
A: Absolutely. Apply a dry rub after the first bake, then finish baking for another 5‑7 minutes. This method keeps the skin crisp and flavorful without added sauce.
Q6: Is the recipe gluten‑free?
A: The base recipe is gluten‑free. Ensure any added sauces (e.g., BBQ, soy) are gluten‑free or substitute with tamari.
- Closing Thoughts
There’s a reason wing night is a universal staple—crunchy skin, juicy meat, and the endless playground of sauces make chicken wings a culinary canvas. By mastering the Oven‑Crisp Chicken Wings technique, you gain the freedom to indulge anytime without the mess, expense, or health concerns that come with deep‑frying.
Give this recipe a try, experiment with the flavor variations, and make it your own signature wing style. Whether you’re feeding a sports‑watching crowd, a family dinner, or just treating yourself after a long day, these wings will earn a permanent spot in your kitchen repertoire.
Ready to wing it? Grab those wings, preheat that oven, and let the crunch begin!
Keywords
- crispy chicken wings
- oven baked wings
- healthy wing recipe
- spicy chicken wings
- garlic parmesan wings
- wing seasoning
Hashtags
#CrispyWings #OvenBaked #HealthyEating #GameDayFood #WingNight #FoodieFavorites
Disclaimer
The nutritional information for this recipe is approximate and may vary based on specific brands, portion sizes, and preparation methods. This blog post is for informational purposes only and does not constitute medical, dietary, or professional advice. Individuals with food allergies, specific dietary restrictions, or health conditions should consult a qualified healthcare professional before preparing or consuming the dish.











Leave a comment