


















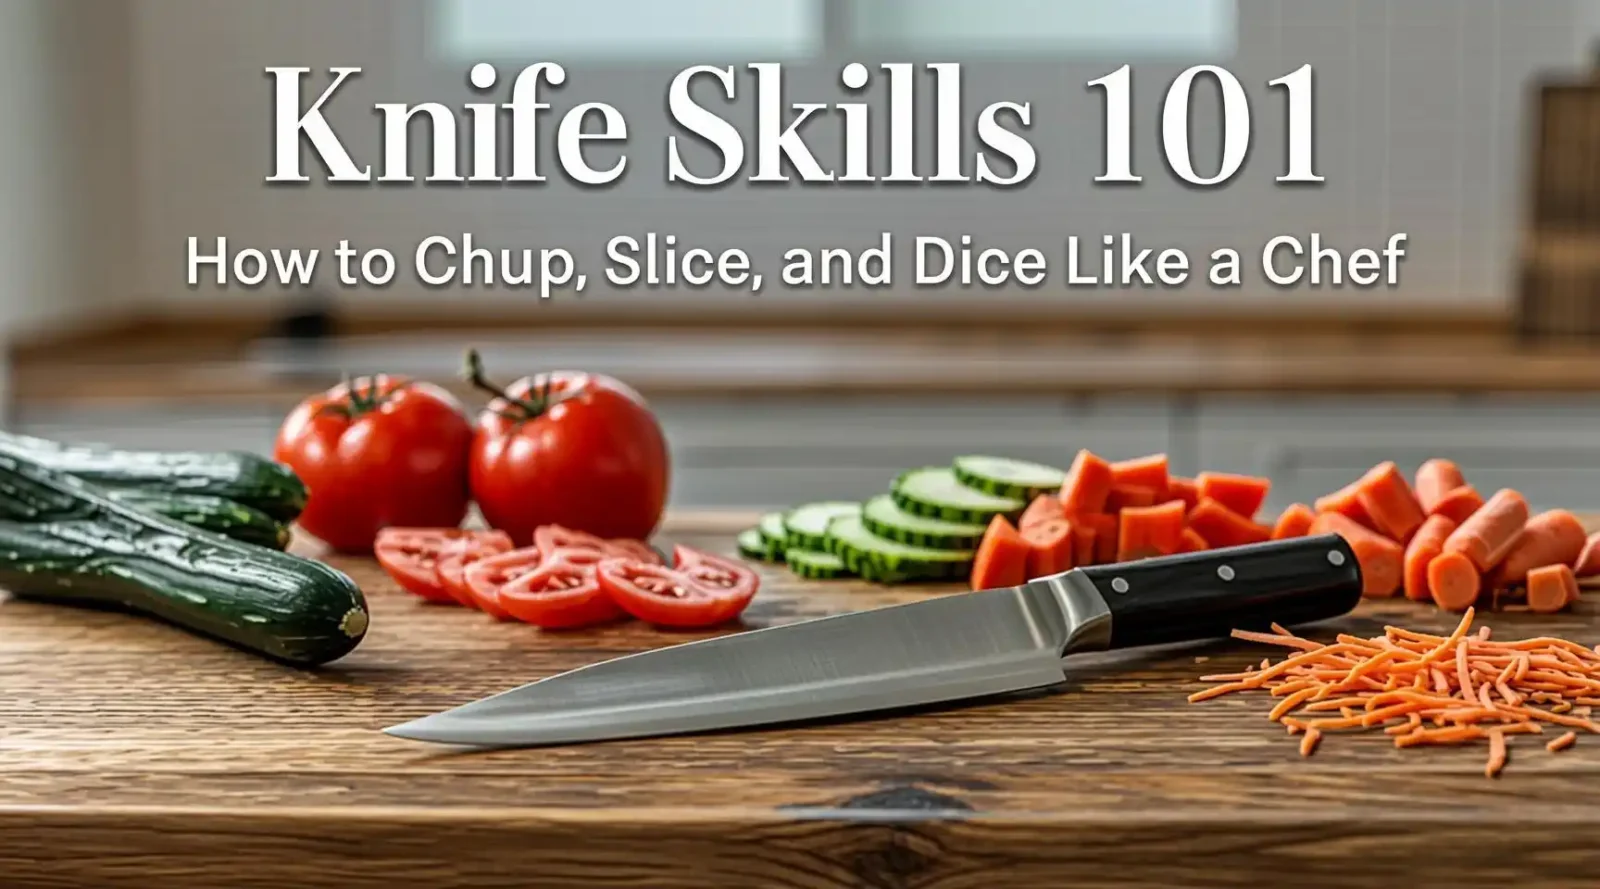
Knife Skills 101: How to Chop, Slice, and Dice Like a Chef
Meta description: Master the fundamentals of knife work with step‑by‑step techniques, safety tips, and maintenance tricks—learn to chop, slice, dice, julienne, and more like a professional chef.
Table of Contents
- Why Knife Skills Matter
- Essential Tools & How to Choose Them
- Safety First: The Chef’s Code
- Grip & Stance: The Foundation of Control
- The Core Cuts
- 5.1. The Basic Chop
- 5.2. The Slice (and the Slide)
- 5.3. The Dice (small, medium, large)
- 5.4. Julienne & Batonnet
- 5.5. Mincing & Brunoise
- 5.6. Chiffonade (herbs & leafy greens)
- Practice Drills to Build Muscle Memory
- Knife Maintenance & Storage
- Common Mistakes & How to Fix Them
- FAQ: Quick Answers to Your Burning Questions
- Wrapping Up: From Home Cook to Kitchen Pro
- Why Knife Skills Matter
If you’ve ever watched a cooking show and thought, “How does that chef make everything look so effortless?” the answer is rarely magic—it’s knife skills. Sharp, precise cuts are more than a visual flourish; they affect texture, flavor release, and cooking time. A carrot cut into uniform 1‑cm dice will steam evenly, while a haphazard ragged chop may remain half‑cooked, resulting in a dish that’s inconsistent in both mouthfeel and taste.
Beyond culinary performance, solid knife technique speeds up prep, reduces waste, and—most importantly—keeps you safe around a razor‑sharp blade. In a professional kitchen, a chef who can dice onions in 30 seconds without injury is a massive productivity boost. The same advantage translates to the home kitchen: dinner is on the table faster, and you can spend more time enjoying the meal instead of wrestling with a dull, uncooperative knife.
Bottom line: Mastering the fundamentals of chopping, slicing, and dicing is the single most effective way to elevate your cooking game.
- Essential Tools & How to Choose Them
Before you start swinging that 8‑inch chef’s knife, make sure you have the right tools. Not every knife is built for every job, and using the wrong blade can sabotage even the best technique.
| Knife Type | Ideal Uses | Approx. Length | Key Features |
| Chef’s Knife | All‑purpose (chop, slice, dice, mince) | 8″–10″ | Curved heel, balanced weight, full tang |
| Santoku | Thin slices, fine dicing, mincing | 5″–7″ | Flat edge, granton (hollow) surface to reduce sticking |
| Utility Knife | Smaller fruits & vegetables, trimming | 4″–6″ | Narrow profile, easy maneuverability |
| Paring Knife | Peeling, intricate work (e.g., deveining shrimp) | 2.5″–4″ | Short blade, precise tip |
| Bread Knife | Crusty loaves, delicate pastries | 8″–10″ | Serrated edge |
| Boning Knife | Deboning meat, filleting fish | 5″–6″ | Thin, flexible blade |
What to Look for in a Good Chef’s Knife
- Blade Material – High‑carbon stainless steel offers a sweet spot between edge retention and rust resistance. Japanese VG‑10 and German X50V are popular premium options.
- Full Tang – The metal should run the entire length of the handle, giving balance and preventing breakage.
- Handle Comfort – Wood (e.g., pakkawood) and composite (e.g., Micarta) handles provide grip and absorb shock. Avoid overly slick plastic unless it’s textured.
- Weight & Balance – A well‑balanced knife feels like an extension of your hand; the weight should sit near the bolster, not at the tip.
If you’re just starting out, a single 8‑inch chef’s knife of decent quality is your best investment. All the fundamental cuts can be performed with it, and you’ll develop a feel for the blade’s curve and give.
- Safety First: The Chef’s Code
Disclaimer: The instructions provided here are for educational purposes only. Always exercise caution, wear appropriate protective gear (e.g., a cut‑resistant glove if needed), and keep your workspace clean. The author and publisher are not liable for any injuries or damages resulting from the use of this information.
Core Safety Rules
- Keep the Blade Sharp – Paradoxically, a dull knife is more dangerous because it requires more pressure, increasing the chance of slip. Hone regularly and sharpen when the edge feels “bendy.”
- Use a Stable Cutting Surface – A non‑slip board (wood or composite) with a damp kitchen towel underneath prevents the board from moving.
- Curl Your Fingertips (the “Claw”) – Tuck the fingertips under and rest them lightly on the top of the food, using the knuckles as a guide for the blade.
- Cut Away From Your Body – Always move the knife forward and outward, never toward your torso.
- Maintain a Clean Workspace – Remove clutter, especially items that could cause you to reach over the knife.
Optional Safety Gear
- Cut‑Resistant Gloves – Useful for beginners or when handling slippery items (e.g., fish).
- Knife Guard/Sheath – Store knives in a protective sleeve to avoid accidental cuts when retrieving them.
- Grip & Stance: The Foundation of Control
You can’t master any cut without a solid grip and stable stance. Below are the two most common grips used by professional chefs.
| Grip | How to Do It | When to Use |
| Pinch Grip | Pinch the blade between thumb and index finger on the side of the blade, while the remaining three fingers wrap around the handle. | Most tasks – chopping, slicing, dicing. Provides maximum control. |
| Handle‑Only Grip | Wrap all fingers around the handle, thumb rests on the side. | When extra leverage is needed (e.g., cutting through bone). |
Stance
- Feet Shoulder‑Width Apart – Provides a solid base.
- Weight Slightly Forward – Center of gravity over the front foot for better balance.
- Knees Slightly Bent – Allows for subtle adjustments while cutting.
Pro tip: Position the food on the cutting board at a slight angle to the blade. This “rocking” motion uses the natural curve of the chef’s knife, letting you cut efficiently with minimal effort.
- The Core Cuts
Below you’ll find step‑by‑step guides for the most common cuts. Each section includes a video placeholder, suggested practice times, and common mistakes to watch for.
5.1. The Basic Chop
What It Is: A rapid, “rocking” motion used to reduce large items (e.g., onions, bell peppers) into rough pieces.
Step‑by‑Step:
- Trim any root ends or stems, if needed.
- Place the ingredient flat on the board. If it’s round (e.g., a carrot), slice a thin piece to create a stable base.
- Grip the knife with the pinch grip.
- Rock the blade: Start with the tip of the knife on the board, lift the heel, then bring the heel down while the tip stays in contact.
- Repeat the motion, allowing the blade’s curvature to do the work. Use your forearm, not just your wrist.
Practice Drill: Chop 1 kg of raw carrots into 2‑cm pieces 10 times. Aim for uniformity.
Common Mistakes:
- Using the wrist only – leads to uneven cuts and fatigue.
- Pressing down too hard – can crush the food and dull the edge.
5.2. The Slice (and the Slide)
What It Is: A smooth, single‑stroke cut, perfect for vegetables, meats, and fruits where you want a clean surface (e.g., tomatoes, cucumbers).
Technique:
- Set the Food – Align the item so the slice will fall away from the board.
- Angle the Blade – For a classic slice, hold the knife at a ~15‑20° angle to the board.
- Draw the Blade – Pull the knife toward you (or push away) in one fluid motion, letting the edge glide.
- Apply Light Pressure – Let the sharpness do the work; a heavy press will crush delicate foods.
Practice Drill: Slice a loaf of bread into even 1‑cm slices using a serrated bread knife, focusing on a smooth, even motion.
Common Mistakes:
- Sawing instead of gliding – creates ragged edges.
- Incorrect angle – too steep and the slice tears, too shallow and the blade skids.
5.3. The Dice
What It Is: Cutting food into uniform cubes. Dicing is divided into three common sizes: small (½‑cm), medium (1‑cm), large (2‑cm).
Step‑by‑Step for a Medium Dice (e.g., onion):
- Peel the onion, leaving the root end intact for stability.
- Slice Horizontally – Place the tip of the knife on the board, make 2–3 horizontal cuts parallel to the board, stopping just before the root.
- Slice Vertically – Turn the onion 90° and make vertical cuts, again stopping before the root.
- Dice – Finally, slice down across the onion, creating medium cubes.
Practice Drill: Dice three different vegetables (onion, carrot, zucchini) into 1‑cm cubes, timing yourself. Aim for consistent size across ingredients.
Common Mistakes:
- Cutting through the root – causes the onion to fall apart, leading to uneven dice.
- Uneven spacing – use the guide of previous cuts to keep distances uniform.
5.4. Julienne & Batonnet
Julienne produces thin match‑stick strips (≈2 mm × 2 mm × 5 cm). Batonnet is a thicker version (≈¼‑inch × ¼‑inch × 5 cm). Both are essential for salads, stir‑fries, and garnishes.
Julienne Technique (e.g., carrot):
- Square Off the carrot to create a rectangular prism.
- Slice the prism into 2‑mm slabs.
- Stack a few slabs, then cut lengthwise into 2‑mm strips.
Batonnet: Same steps, but cut slabs and strips about ¼‑inch thick.
Practice Drill: Create a 10‑cm pile of julienned carrots; the strips should be uniform enough to pack neatly.
Common Mistakes:
- Uneven slabs leading to irregular strips.
- Using a serrated blade – results in ragged edges.
5.5. Mincing & Brunoise
Mincing is a fine chop (≈1‑mm pieces) used for garlic, herbs, or shallots. Brunoise is a precise dice of 1‑mm cubes, often after mincing and then re‑dicing.
Mincing Procedure (e.g., garlic):
- Crush the clove with the flat side of the knife for easier peeling.
- Slice thinly, then gather the slices and chop repeatedly until the desired size.
Brunoise (from a carrot):
- Julienne the carrot first.
- Gather the sticks and dice them perpendicular to create 1‑mm cubes.
Practice Drill: Mince three garlic cloves until you achieve a paste-like consistency. Then brunoise a carrot into a 2‑cm‑wide mound.
Common Mistakes:
- Over‑tapping – creates mushy rather than crisp pieces.
- Skipping the uniform prior cut – leads to uneven brunoise.
5.6. Chiffonade (Herbs & Leafy Greens)
What It Is: Thin ribbons of leafy herbs (basil, mint) or greens.
Method:
- Stack the leaves, overlapping slightly.
- Roll them tightly into a cigar shape.
- Slice perpendicular to the roll with a sharp knife.
Practice Drill: Produce a chiffonade of 15 basil leaves; the ribbons should be light, airy, and roughly 2‑mm wide.
Common Mistakes:
- Using a dull blade – bruises the leaves, turning them brown.
- Slicing too thick – defeats the purpose of the technique.
- Practice Drills to Build Muscle Memory
| Drill | Duration | Goal |
| Rock‑Chop Reps – 50 chops of a carrot | 5 min | Smooth rocking motion |
| Sheet‑Slice Timing – 30 tomato slices | 3 min | Consistent glide, no crushing |
| Cube‑Cadence – 20 × 1 cm dice of onion, carrot, zucchini | 10 min | Uniform size across veg |
| Julienne Relay – 15 cm of carrot julienne in 1 min | 5 min | Fast, precise strips |
| Mince‑Madness – 5 g garlic to paste in 2 min | 2 min | Efficient mincing without a press |
Routine Tip: Warm‑up with a cheap, blunt kitchen knife for 2–3 minutes. This gets your hands used to controlling the blade without the intimidation of a razor‑sharp edge. Then switch to your high‑quality chef’s knife and repeat the drills.
- Knife Maintenance & Storage
A well‑maintained knife lasts a lifetime and performs better in every cut.
Sharpening
- Honing (Daily/Weekly) – Use a fine‑grade honing steel (800‑1000 grit) at a 15‑20° angle.
- Sharpening (Monthly or As Needed) – A whetstone (1000/6000 grit) or a quality electric sharpener.
Pro tip: After each sharpening session, wipe the blade with a lightly oiled cloth to prevent rust.
Cleaning
- Hand‑wash Only – Use warm water, mild detergent, and a soft sponge.
- Dry Immediately – Avoid air‑drying to prevent water spots.
Storage
- Knife Block – Good for short‑term; ensure slots are not too tight.
- Magnetic Strip – Keeps knives visible and accessible, but keep a protective cover over the blade for safety.
- Knife Sheath – Ideal for drawer storage or travel.
- Common Mistakes & How to Fix Them
| Mistake | Why It Happens | Fix |
| “Rocking Too Far” – blade tip leaves the board | Over‑enthusiasm, lack of control | Keep the tip anchored; practice on a soft vegetable first. |
| “Sawing Motion on Soft Produce” | Trying to compensate for a dull blade | Sharpen or hone the knife; use a slicing motion instead. |
| “Holding the Knife Too Tightly” | Fear of slipping | Adopt the pinch grip; it offers control without crushing the hand. |
| “Improper Angle on Slicing” | Not visualizing the 15‑20° angle | Use a guide (e.g., a piece of paper) to practice the angle before cutting. |
| “Storing the Knife Blade Down” (in a drawer) | Convenience | Switch to a block or magnetic strip; this prevents dulling the edge. |
- FAQ: Quick Answers to Your Burning Questions
Q1: How often should I sharpen my chef’s knife?
Answer: Hone before or after each major prep session. Sharpen with a whetstone or professional service every 4–6 weeks, depending on usage and steel type.
Q2: Can I use a serrated knife for dicing?
Answer: No. Serrated knives are designed for cutting through crusts and soft interiors, not for clean, uniform cuts. Use a straight‑edge chef’s or santoku knife for dicing.
Q3: Is a 7‑inch chef’s knife better than an 8‑inch?
Answer: It’s a matter of comfort. Smaller chefs or those with limited storage may prefer 7‑inch; however, the 8‑inch offers a longer cutting edge, useful for larger ingredients.
Q4: Do I need to buy an expensive knife to learn proper cuts?
Answer: While a decent-quality knife (around $80–$150) is advisable, technique matters more than cost. A blunt, cheap knife will teach you the same fundamentals—just safer when sharp.
Q5: What’s the difference between a santoku and a chef’s knife?
Answer: Santoku knives have a flatter edge and a slightly shorter length, favoring quick, precise chopping. Chef’s knives have a pronounced curve, facilitating a full rocking motion.
Q6: Should I wash my knife in the dishwasher?
Answer: Never. The high heat and harsh detergents can corrode the steel and damage handles. Hand‑washing is the only safe method.
- Wrapping Up: From Home Cook to Kitchen Pro
Knife mastery isn’t a secret reserved for Michelin‑star kitchens; it’s a skill you can acquire one hobby‑cut at a time. Start with the basics—perfect the pinch grip, set up a stable board, and practice the rocking chop on a carrot. Gradually integrate slicing, dicing, and advanced cuts like julienne and brunoise.
Remember: Consistency beats speed. A perfectly diced onion cooked evenly will taste better than a hastily thrown‑together medley of uneven pieces. As you build confidence, you’ll find yourself moving through prep faster, freeing up mental bandwidth to focus on seasoning, plating, and the joy of cooking.
So, grab your chef’s knife, sharpen that edge, and let the rhythm of the blade become the soundtrack of your kitchen. The next time you serve a beautifully sliced steak or a uniformly diced salsa, you’ll know exactly which knife skill made it possible.
Happy chopping!
Keywords
- Knife skills
- Chef techniques
- Cutting methods
- Kitchen safety
- Culinary knives
- Food preparation
Hashtags
#KnifeSkills #CookingTips #ChefLife #FoodPrep #CulinaryArts #KitchenSafety
If you found this guide helpful, share it with fellow food lovers and let us know which cut you’re mastering next in the comments!













Leave a comment