


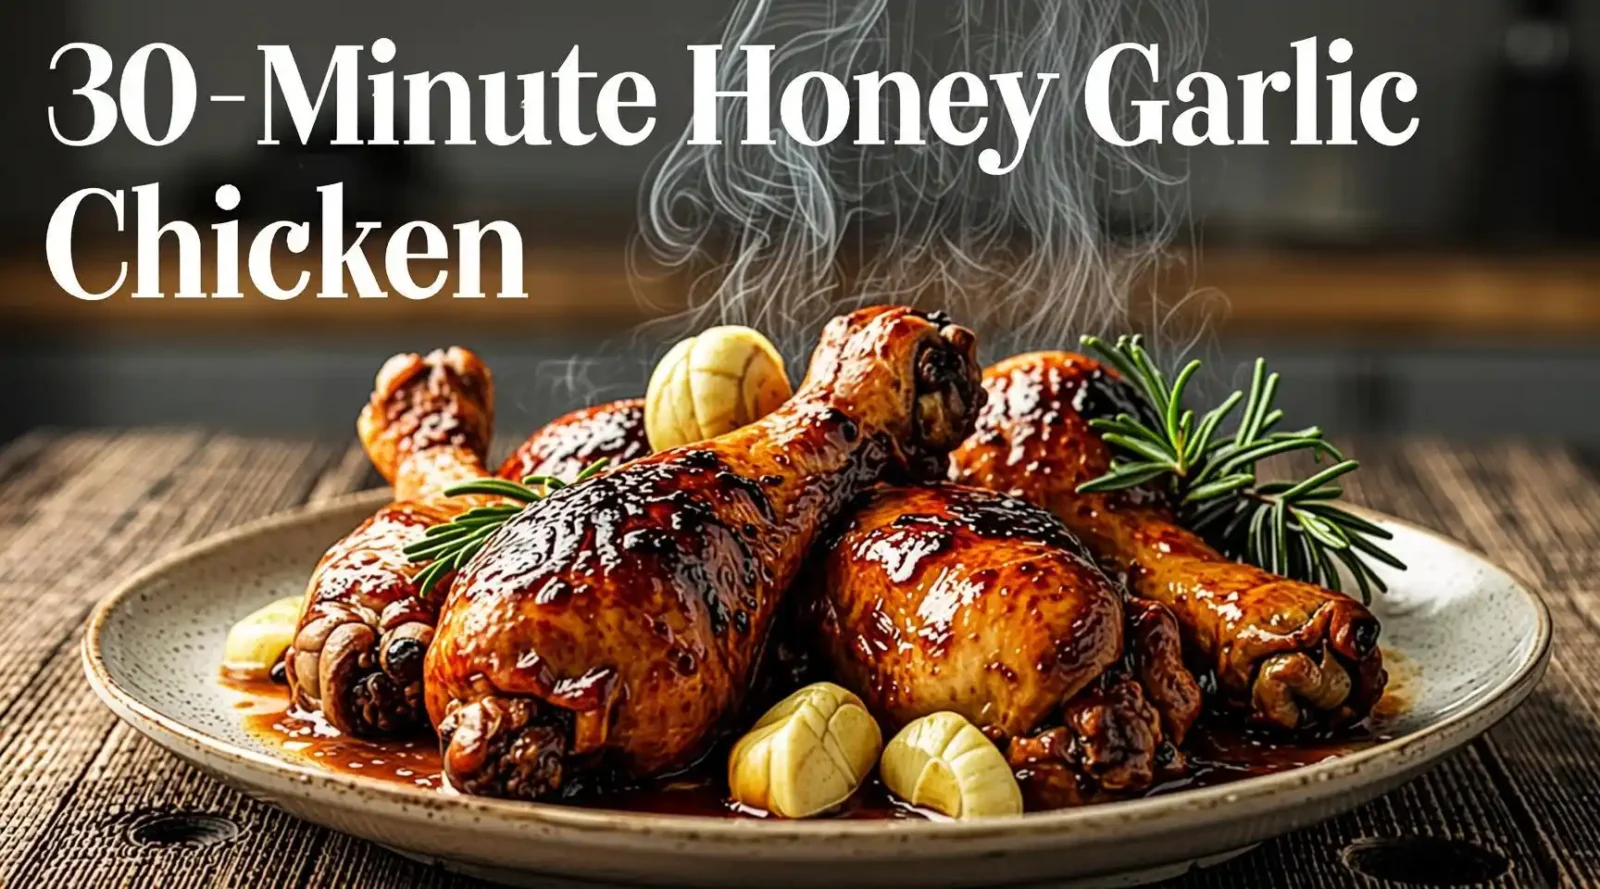
30‑Minute Honey Garlic Chicken: The Fast, Flavor‑Packed Dinner Your Weeknight Deserves
Meta description:
A step‑by‑step guide to making irresistibly sweet‑and‑savory honey garlic chicken in just 30 minutes. Perfect for busy families, this quick dinner blends tender chicken, aromatic garlic, and honey‑glazed goodness—plus tips, variations, and nutrition facts to keep the whole household smiling.
Introduction
After a long day of meetings, classes, or errands, the last thing most of us want to do is stare at a mountain of ingredients and wrestle with a recipe that takes hours to finish. Yet, the yearning for a mouth‑watering dinner that feels indulgent yet wholesome is universal. Enter the 30‑Minute Honey Garlic Chicken—a recipe that hits every mark: it’s fast, it’s flavorful, and it’s adaptable to multiple dietary preferences.
In this comprehensive post, you’ll discover:
- A clear, chronological walkthrough of the recipe.
- Insider tips that guarantee perfectly caramelized chicken every time.
- Simple swaps for a healthier or spicier spin.
- Nutritional breakdowns for the health‑conscious eater.
- Frequently asked questions that solve common cooking dilemmas.
All of this is delivered in a family‑friendly, easy‑to‑follow format that even novice cooks can master. Let’s dive right in!
Why Honey Garlic Chicken?
- Balance of Sweet and Savory
The hallmark of honey garlic chicken is its sweet‑and‑savory harmony. Honey provides natural sweetness and a glossy glaze, while garlic contributes depth, pungency, and a subtle bite. Together, they create a sauce that clings to every bite of chicken, delivering layered flavor that keeps you coming back for seconds.
- Speed Without Sacrificing Taste
Most “quick” chicken recipes rely on pre‑made sauces or frozen products, which can compromise flavor. This recipe uses fresh garlic, real honey, and pantry staples to craft a sauce from scratch in under ten minutes, preserving both taste and nutritional value.
- Versatility at Its Core
Whether you’re feeding picky kids, planning a low‑carb dinner, or hosting a casual dinner‑party, honey garlic chicken adapts. Pair it with rice, stir‑fried veggies, cauliflower mash, or even a crisp salad—the dish fits seamlessly into any meal plan.
Ingredient Overview
Below is the complete list of ingredients you’ll need. Feel free to adjust measurements to serve more or fewer people; the ratio of sauce to chicken remains consistent, ensuring that each piece is coated in that coveted glaze.
- 1 ½ lb (≈ 680 g) boneless, skinless chicken thighs (or breasts, if you prefer leaner meat)
- 3 tablespoons olive oil (or avocado oil for a higher smoke point)
- 5 cloves garlic, minced (or 2 teaspoons pre‑minced garlic)
- ¼ cup (60 ml) honey – choose raw or locally sourced for extra depth
- ¼ cup (60 ml) low‑sodium soy sauce – tamari works for gluten‑free diners
- 2 tablespoons rice vinegar – adds a bright acidity that cuts the sweetness
- 1 teaspoon cornstarch mixed with 1 tablespoon water (optional, for a thicker sauce)
- ½ teaspoon red‑pepper flakes (optional, for a subtle heat)
- Freshly ground black pepper, to taste
- Salt, as needed (remember soy sauce already contributes sodium)
- Chopped fresh scallions or cilantro, for garnish
Ingredient notes:
- Chicken thighs stay juicier and more forgiving than breasts when cooked quickly, making them ideal for a 30‑minute window.
- Honey is the natural sweetener; if you’re avoiding added sugars entirely, substitute with a stevia‑based blend, though the glaze will be less sticky.
- Low‑sodium soy sauce lets you control the final salt level—especially important if serving with salty sides like fried rice.
Equipment Checklist
- Large non‑stick skillet or sauté pan (12‑inch works best)
- Small mixing bowl (for the cornstarch slurry)
- Chef’s knife & cutting board
- Silicone spatula or wooden spoon
- Measuring spoons & cups
- Plate for resting cooked chicken (optional but helpful for timing)
Step‑by‑Step Instructions
Step 1: Prep the Chicken
- Pat the chicken dry with paper towels. Removing excess moisture ensures a good sear.
- Season lightly with a pinch of salt and freshly ground black pepper on both sides.
- Slice the thighs into bite‑size strips or keep them whole for larger pieces—this influences cooking time (strips cook faster).
Pro tip: If you have a minute, lightly toss the chicken in a tablespoon of cornstarch before cooking. It creates a thin crust that locks in moisture and helps the sauce adhere.
Step 2: Sear the Chicken
- Heat the skillet over medium‑high heat and add the olive oil.
- Once the oil shimmers, add the chicken in a single layer—don’t crowd the pan.
- Sear for 3–4 minutes per side (or until golden brown). The interior should still be pink; we’ll finish cooking in the sauce.
- Transfer the chicken to a plate and set aside.
Why this matters: A quick sear gives the chicken Maillard‑derived flavor, while leaving the interior slightly undercooked ensures it finishes perfectly in the sauce without becoming dry.
Step 3: Build the Honey Garlic Sauce
- Reduce heat to medium and add the minced garlic to the same pan. Stir for 30 seconds—you’ll hear a gentle sizzle, and the aroma will start to fill the kitchen.
- Pour in the honey, soy sauce, and rice vinegar. Whisk continuously to combine; the mixture will bubble lightly.
- If you like a spicy kick, stir in the red‑pepper flakes now.
- Allow the sauce to simmer for 2–3 minutes. It will reduce slightly, intensifying the flavors.
Pro tip: Taste at this stage. If you need more brightness, add a splash of extra rice vinegar; if you crave sweetness, drizzle in a tiny drizzle of honey. Adjustments are easier before the chicken re‑enters the pan.
Step 4: Finish the Chicken in the Sauce
- Return the seared chicken (and any collected juices) to the skillet.
- Toss to coat each piece thoroughly.
- If you desire a thicker glaze, stir in the cornstarch slurry now. Cook for an extra 1–2 minutes, allowing the sauce to thicken and cling.
- Continue to cook for an additional 4–5 minutes, stirring occasionally, until the chicken reaches an internal temperature of 165°F (74°C) and the sauce is glossy.
Step 5: Plate and Garnish
- Transfer the honey garlic chicken to a serving dish.
- Sprinkle chopped scallions or cilantro over the top for color, freshness, and a pop of herbaceous aroma.
- Serve immediately while the glaze is still warm and shiny.
Serving Suggestions
Honey garlic chicken shines on its own, but pairing it with complementary sides elevates the meal:
- Steamed Jasmine rice or brown rice – absorbs the sauce beautifully.
- Quinoa or couscous – adds texture and protein for a complete plant‑forward plate.
- Roasted vegetables (broccoli, carrots, bell peppers) – lightly tossed in olive oil, salt, and pepper, then roasted at 425°F (220°C) for 20 minutes.
- Garlic butter noodles – for an indulgent, Italian‑inspired twist.
- Fresh garden salad with a citrus vinaigrette – balances sweetness with acidity.
Feel free to get creative; the dish’s versatile flavor profile makes it a perfect canvas.
Nutrition Snapshot
Below is an approximate nutritional breakdown per serving (based on 4 servings from the original recipe). Adjust portions accordingly for different calorie needs.
| Nutrient | Approx. Amount |
| Calories | 320 kcal |
| Protein | 25 g |
| Total Fat | 12 g (mostly from olive oil) |
| Saturated Fat | 2 g |
| Carbohydrates | 28 g |
| Sugars | 22 g (natural honey) |
| Sodium | 560 mg (reduced‑sodium soy sauce) |
| Fiber | 1 g |
| Vitamin A | 6 % DV |
| Vitamin C | 8 % DV |
Note: The honey contributes natural sugars, but the overall sugar content is modest compared with many store‑bought sauces. For a lower‑carb version, halve the honey and replace half with a sugar‑free sweetener like erythritol.
Expert Tips & Tricks
- Don’t Skip the Sear
Even though time is precious, a quick sear creates depth that a simple boil cannot mimic. Use a hot pan and avoid moving the chicken until the edges turn golden.
- Use Fresh Garlic
Pre‑minced garlic loses volatile oils quickly, resulting in a milder flavor. Freshly minced cloves give a robust, aromatic punch that truly stands out in the sauce.
- Control the Heat
If the sauce begins to burn or stick, lower the temperature. The sauce should simmer gently, not roar vigorously.
- Adjust Consistency
When in doubt, the cornstarch slurry is your rescue. Just remember: add it gradually. Once the sauce reaches your desired thickness, stop stirring to avoid over‑cooking the cornstarch, which can become gummy.
- Make It Ahead
The sauce stores well; prepare it up to 3 days in advance, refrigerate in an airtight container, and reheat before adding the chicken. This cuts the weekday prep time to under ten minutes.
- Add a Crunch
Top the dish with toasted sesame seeds, crushed peanuts, or crispy fried onions for textural contrast.
Variations to Keep Things Fresh
| Variation | What to Change | Flavor Impact |
| Spicy Szechuan | Add 1 tsp Szechuan peppercorn oil, double the red‑pepper flakes, drizzle a teaspoons of chili garlic sauce | Tangy heat with a numbing peppercorn note |
| Citrus‑Infused | Replace rice vinegar with orange juice, add zest of one lemon, increase honey slightly | Bright, sunny notes that lift the sweet profile |
| Herb‑Lemon | Swap cilantro for fresh thyme, add 1 tbsp lemon juice at the end | Earthy aroma with a fresh citrus finish |
| Low‑Sugar | Use a calorie‑free sweetener (e.g., monk fruit) and reduce honey to 2 tbsp | Lower sugar without losing gloss |
| Gluten‑Free | Substitute soy sauce with tamari or coconut aminos | Same savory depth, suitable for gluten‑intolerant diners |
| Vegan (swap chicken) | Use firm tofu or tempeh, press, cube, and follow same sear method | Plant‑based alternative with similar texture |
Feel free to mix and match—cooking is an art, after all.
Frequently Asked Questions
Q1: Can I use chicken breasts instead of thighs?
Absolutely. Trim them to equal thickness for even cooking. Because breasts are leaner, they can dry out if overcooked, so reduce the searing time to 2‑3 minutes per side and keep the final simmer time short (about 4 minutes) to ensure juiciness.
Q2: Is it okay to substitute maple syrup for honey?
Yes—maple syrup provides a similar sweetness with a distinct caramel flavor. Keep the quantity the same, though the glaze may be slightly thinner; you might need a touch more cornstarch to achieve the same thickness.
Q3: What if I don’t have rice vinegar?
Apple cider vinegar works as a stand‑in, though it adds a fruitier tang. Use the same amount (¼ cup). If you only have regular white vinegar, dilute it 1:1 with water to reduce harshness.
Q4: Can I freeze leftovers?
The chicken holds up well for freezing. Store in an airtight container, leaving the sauce with the chicken (it helps preserve moisture). Thaw in the refrigerator overnight, then reheat gently on the stovetop over low heat, adding a splash of water if the sauce has thickened too much.
Q5: How do I make this dish dairy‑free?
The recipe is already dairy‑free. Just ensure any side dishes you serve with it (e.g., mashed potatoes) also avoid butter or cream if you need a fully dairy‑free meal.
Q6: My sauce got too salty—what can I do?
Stir in a tablespoon of water or low‑sodium broth to dilute. Adding a pinch of sugar or extra honey can also balance the saltiness. If needed, finish with a squeeze of fresh lemon juice for brightness.
The Science Behind the Sweet‑Savory Magic
Understanding why the combination works can deepen your appreciation and help you innovate.
- Caramelization vs. Maillard Reaction – The seared chicken undergoes the Maillard reaction, creating complex flavor compounds. Meanwhile, honey’s sugars caramelize lightly in the sauce, adding a toasted sweetness.
- Umami Boost from Soy Sauce – Soy sauce is rich in glutamates, which enhance the perception of savoriness. When paired with garlic’s sulfur compounds, the overall flavor profile becomes more rounded and satisfying.
- Balancing Acidity – Rice vinegar introduces acidity that cuts through the sweetness, preventing the dish from tasting cloyingly sugary. This equilibrium triggers salivation, heightening flavor delivery.
- Textural Contrast – A glossy glaze adheres to the chicken’s surface, while a possible garnish of nuts or sesame seeds adds crunch, giving the mouthfeel a pleasant variation.
A Few Final Thoughts
The 30‑Minute Honey Garlic Chicken is more than just a quick weekday dinner; it’s a showcase of how simple pantry staples can create a restaurant‑quality dish without the stress of elaborate preparation. By mastering the timing of searing, sauce creation, and final simmering, you’ll gain confidence to tackle a host of other fast, flavorful meals.
Remember: cooking is an evolving practice. Use the base recipe as your canvas, experiment with flavors, and adapt to the ingredients you have on hand. When done right, that first bite of glossy, aromatic chicken will feel like a small celebration—one you can repeat three times a week without ever growing bored.
Keywords
- honey garlic chicken
- quick chicken recipe
- easy dinner ideas
- 30 minute meals
- healthy chicken dinner
- family‑friendly recipes
Hashtags
#HoneyGarlicChicken #30MinuteMeals #QuickDinner #EasyRecipes #FamilyFood #HealthyEating
Disclaimer
The nutritional information and cooking times provided in this article are estimates and may vary based on individual ingredients, equipment, and personal dietary needs. Always ensure that poultry reaches an internal temperature of 165°F (74°C) for safe consumption. This blog post is for educational and informational purposes only and should not replace professional nutrition, medical, or culinary advice.


Leave a comment