














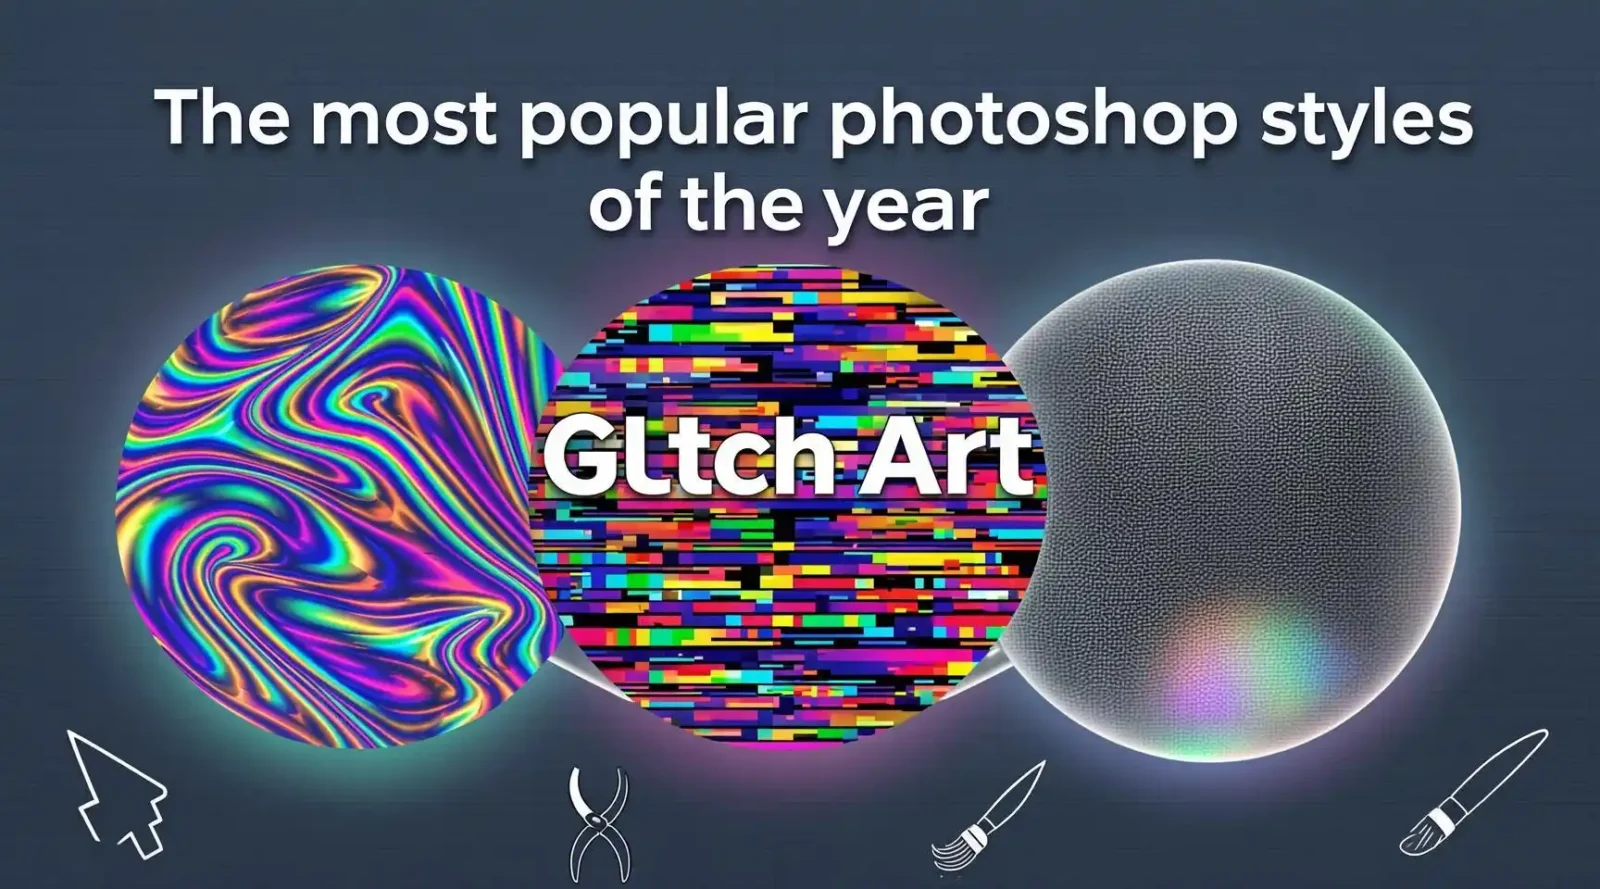
The Most Popular Photoshop Styles of the Year: A Deep Dive into 2024’s Hottest Creative Trends
Published on April 10, 2026
TL;DR – This year’s Photoshop landscape is dominated by three overarching styles: Cinematic Grunge, Hyper‑Realistic 3‑D Integration, and AI‑Enhanced Surrealism. Each style reflects broader cultural shifts, advances in software capabilities, and the ever‑growing appetite for bold, share‑worthy visuals. In this 2,300‑word guide we’ll break down the aesthetics, the tools, the step‑by‑step workflow, and the real‑world use cases that have made these trends the most sought‑after in the creative community.
Table of Contents
- Why Photoshop Trends Matter in 2024
- Trend #1: Cinematic Grunge – The Moody Revival
- 2.1. Core Aesthetic Elements
- 2.2. Essential Tools & Settings
- 2.3. Sample Project Walk‑Through
- 2.4. Who’s Using It? (Brands & Creators)
- Trend #2: Hyper‑Realistic 3‑D Integration – When Flat Meets Depth
- 3.1. Core Aesthetic Elements
- 3.2. Essential Tools & Settings
- 3.3. Sample Project Walk‑Through
- 3.4. Who’s Using It? (Brands & Creators)
- Trend #3: AI‑Enhanced Surrealism – Dreamscapes on Demand
- 4.1. Core Aesthetic Elements
- 4.2. Essential Tools & Settings
- 4.3. Sample Project Walk‑Through
- 4.4. Who’s Using It? (Brands & Creators)
- [Cross‑Trend Techniques: How to Blend Styles Seamlessly]
- [Future‑Proofing Your Skill Set: Learning Pathways for 2025‑2026]
- [Conclusion: The Takeaway for Designers, Marketers, and Hobbyists]
- [Quick Reference Cheat‑Sheet]
- [Disclaimer]
- Why Photoshop Trends Matter in 2024
Photoshop has been the industry’s lingua franca for digital imaging since the early ‘90s, but the way we talk, think, and sell visuals has evolved dramatically in the last decade.
- Cultural relevance: Visual aesthetics are now direct reflections of sociopolitical moods, generational ethos, and global events. The “post‑pandemic optimism” of 2020‑2022 gave way to a “re‑evaluation of authenticity” in 2023, and in 2024 we see a collective yearning for both nostalgia and hyper‑futureism.
- Technology acceleration: The integration of AI‑driven generators (Adobe Firefly, Midjourney, DALL·E 3) and real‑time 3‑D engines (Adobe Substance, Blender live‑link) has opened doors to styles that were once impossible or prohibitively time‑consuming.
- Commerce pressure: Brands now chase share‑worthy content faster than ever—think TikTok virality and Instagram carousel loops. A single, on‑trend Photoshop edit can be the difference between a scroll‑past and a scroll‑stop.
Understanding and mastering the most popular styles isn’t just about artistic expression; it’s a strategic advantage for anyone who wants their work to cut through the noise. Below we unpack the three dominant Photoshop styles that have dominated portfolios, ad campaigns, and social feeds throughout 2024.
- Trend #1: Cinematic Grunge – The Moody Revival
2.1 Core Aesthetic Elements
| Element | Description | Visual Cue |
| Desaturated Color Palette | Dominantly muted tones (charcoal, slate blue, ochre) with selective color pops (neon orange, electric teal). | ![Desaturated image with orange accent] |
| Film Grain & Scratch Overlays | Subtle noise, dust, and light scratches to mimic analog film. | ![Film grain overlay] |
| Vignette & Light Leaking | Darkened edges paired with accidental light flares that hint at vintage lenses. | ![Vignetted portrait] |
| Typography Blend | Bold, all‑caps serif or slab‑serif headlines with distressed textures. | ![Grunge typography] |
| Depth of Field Emphasis | Strong background blur (Bokeh) juxtaposed with razor‑sharp subjects. | ![Shallow depth] |
The “Cinematic Grunge” style draws heavily from late‑90s indie movie posters and early‑2000s music album artwork, but it is amplified with modern tools that let you apply these elements with surgical precision.
2.2 Essential Tools & Settings
| Tool | How to Use | Quick Tip |
| Curves (Ctrl + M) | Lift the toe and lower the shoulder to create S‑shaped contrast, then add a slight hue shift in the midtones. | Use a single‑point curve to preserve highlights. |
| Camera Raw Filter | Add Grain (Amount = 15–25), adjust Clarity to –10 for a softer look, and apply Split Toning: Shadows = deep teal, Highlights = warm amber. | Save this as a preset for batch processing. |
| Overlay Layers (Grain, Scratch) | Place a high‑resolution grain texture in Overlay mode, set opacity 15‑30%. | Use Layer Masks to keep central subjects clean. |
| Gradient Map | Map tones to a duotone palette (e.g., dark navy → muted gold). | Toggle Blend If to limit effect to shadows only. |
| Adjustment Brush (Spot Healing) | Remove modern digital artifacts that clash with the vintage vibe. | Keep a soft brush (radius ~50 px) for subtlety. |
Pro tip: In Photoshop 2024, the Neural Filters > Film Grain can generate realistic grain with a single click, but for finer control use the traditional Camera Raw workflow.
2.3 Sample Project Walk‑Through
Scenario: A music festival wants a promo poster featuring a headliner’s portrait with a gritty, cinematic vibe.
- Import & Prepare – Open the high‑resolution portrait, duplicate the background layer, and convert to Smart Object (so you can non‑destructively edit).
- Base Contrast – Apply a Curves S‑curve (mid‑tone boost) and Layer > New Adjustment Layer > Color Balance (Shadows: –20 % Red, +10 % Blue).
- Add Grain – Insert a Camera Raw Filter → Grain (Amount = 22, Size = 1), then Overlay a 4K grain texture set to Overlay blending, 20 % opacity.
- Create Vignette – Add a Radial Gradient (black to transparent) on a new layer, set blending mode to Multiply, feather 200 px.
- Color Pop – Use Selective Color to isolate the singer’s jacket, boosting the Cyan channel for a neon accent.
- Typography – Choose a distressed slab‑serif, apply a Layer Style → Bevel & Emboss (inner, depth = 150 %). Mask the text to apply a subtle Noise overlay.
- Export – File > Export > Export As > PNG (transparent) and High‑Quality JPEG for print.
Result: A poster that feels like a still from a 1970s crime drama, but with modern sharpness that grabs the eye on Instagram feeds.
2.4 Who’s Using It? (Brands & Creators)
| Brand / Creator | Use‑Case | Platform |
| Nike (Women’s Running Campaign) | Dark‑tone athlete portraits with subtle grain, paired with neon‑highlighted product shots. | Instagram Reels, Outdoor Billboards |
| Spotify “Fresh Finds” Playlist Covers | Grunge‑styled album art that blends 70’s vinyl aesthetic with contemporary colors. | Playlist thumbnails |
| Indie Photographer @RuthLens | Personal portfolio series titled “Echoes of Asphalt” — tells urban stories through muted palettes. | Behance, TikTok |
| Adobe Max 2024 Keynote Slides | Live demo of “Cinematic Grunge” to showcase new Neural Filter controls. | Live streaming, PDF handouts |
- Trend #2: Hyper‑Realistic 3‑D Integration – When Flat Meets Depth
3.1 Core Aesthetic Elements
| Element | Description | Visual Cue |
| Photorealistic 3‑D Objects | Objects rendered with physically‑based rendering (PBR) that mimic real‑world materials (metal, glass, fabric). | ![3D coffee mug in a flat scene] |
| Seamless Shadow & Reflection Matching | Accurate contact shadows, ambient occlusion, and environment reflections that bind 3‑D assets to 2‑D layers. | ![Shadow‑matched 3D] |
| Dynamic Lighting | Use of HDRI environments or directional lights that create dramatic flare and gradient highlights. | ![Dramatic key light] |
| Macro Detailing | Extreme close‑ups that show texture at micro‑scale (e.g., wood grain, skin pores). | ![Macro 3‑D detail] |
| Integrated Text Overlays | 3‑D‑styled text that appears to be engraved or floating in the scene, often with depth cues (parallax). | ![Engraved 3D text] |
The Hyper‑Realistic 3‑D Integration style is the visual embodiment of “real meets virtual.” Thanks to Adobe’s Substance 3D suite and tighter Photoshop‑After Effects pipelines, creators now embed complex 3‑D assets directly into their 2‑D compositions without ever leaving Photoshop.
3.2 Essential Tools & Settings
| Tool | How to Use | Quick Tip |
| 3D Workspace (Window > 3D) | Import OBJ/FBX files, set Material presets, and align with camera perspective. | Turn on Render Settings > Global Illumination for realistic lighting. |
| Adobe Substance 3D Assets | Drag‑and‑drop a pre‑made material (e.g., brushed steel) onto your 3‑D object. | Use Smart Materials for automatic adaptation to scene lighting. |
| Depth Map (Layer > New > Depth Map) | Generate a depth map from a 2‑D photo to align 3‑D objects using Displace. | Keep the depth map 16‑bit for smoother displacement. |
| Layer Styles (Bevel, Drop Shadow) | Add subtle inner glow to make 3‑D text appear etched into a surface. | Keep size under 10 px to avoid cartoonish looks. |
| Render Queue (File > Export > Render Video/3D) | Export final image through Adobe Media Encoder, choosing PNG‑8/24 for transparent backgrounds. | Use Ray‑traced rendering for maximum realism but beware of longer render times. |
Speed hack: For quick mock‑ups, the new Photoshop “3‑D to 2‑D” AI Converter (Beta) automatically converts a low‑poly object into a photorealistic flattening that you can edit like any raster layer.
3.3 Sample Project Walk‑Through
Scenario: A premium coffee brand launches a limited‑edition “Space Roast” line; they need a hero image featuring a floating espresso cup with cosmic reflections.
- Set Up the Canvas – 3000 × 3000 px, 300 dpi. Create a new 3‑D layer → Import → OBJ (cup model from Substance 3D).
- Apply Materials – Drag Metallic Matte onto the cup’s body, a Glass material to the handle. Adjust Roughness to 0.12 for a sleek shine.
- Lighting – Add an HDRI environment (space nebula). Rotate the environment to position bright stars behind the cup, creating rim lighting.
- Create the Background – Import a high‑resolution dark‑blue nebula photograph. Convert to Smart Object, then apply Gaussian Blur (radius = 30 px).
- Shadow Integration – In the 3‑D panel, enable Contact Shadows. Position a subtle Plane beneath the cup, set to Matte and Opacity = 25 %.
- Reflection Matching – Duplicate the background layer, flip vertically, mask to only cover the cup’s lower half, set blending mode to Screen, opacity 15 %.
- Add Text – Use 3‑D Extrude on the brand name, apply a Metallic Gold material, and set Bevel to 5 px. Position text to appear as if it’s floating above the cup.
- Final Color Grading – Add a Color Lookup Table (CineLook) adjustment layer, tweak Exposure +0.2, Vibrance +10.
- Export – Render via Render Queue (Ray‑Traced) to PNG (transparent background) for web, and a TIF for print.
Result: A hyper‑realistic still that makes viewers feel the cup is levitating in a galaxy, blurring the line between product photography and visual storytelling.
3.4 Who’s Using It? (Brands & Creators)
| Brand / Creator | Use‑Case | Platform |
| Apple (MacBook Pro Launch) | 3‑D product renders with precise reflections and dynamic lighting. | Apple.com, Apple Event live streams |
| L’Oréal “Future Beauty” Campaign | Hyper‑realistic 3‑D skin texture overlays merged with portrait photography. | Instagram carousel, YouTube ads |
| VFX Artist @PixelMason | Daily “3‑D in Photoshop” tutorials showcasing quick integration tricks. | TikTok, Skillshare |
| Adobe Substance 3D Community Gallery | Celebration of community‑created assets used in Photoshop 3‑D workflows. | Adobe Behance, Discord |
- Trend #3: AI‑Enhanced Surrealism – Dreamscapes on Demand
4.1 Core Aesthetic Elements
| Element | Description | Visual Cue |
| AI‑Generated Base Imagery | Initial compositions produced via text‑to‑image models (e.g., “A floating city made of origami”). | ![AI based surreal image] |
| Layered Metamorphosis | Multiple AI‑generated layers blended with traditional Photoshop masking to create fluid transformations. | ![Layered surreal blend] |
| Glitch & Data‑Moshing | Intentional pixel‑level distortions, chroma‑aberration, and data‑mosh effects. | ![Glitch effect] |
| Ethereal Lighting | Soft, diffused glows, often with bioluminescent accents that don’t follow real‑world physics. | ![Bioluminescent glow] |
| Symbolic Motifs | Repeating symbols (eyes, clocks, feathers) used to weave narrative threads. | ![Symbolic motif collage] |
Surrealism has always been a playground for Photoshop veterans, but 2024 marks the first year where AI is the primary ideation engine. The workflow is now “prompt‑to‑canvas”: generate a concept with an AI model, then refine, composite, and polish in Photoshop.
4.2 Essential Tools & Settings
| Tool | How to Use | Quick Tip |
| Adobe Firefly (Beta) – Text‑to‑Image | Input a detailed prompt, select style presets (e.g., “Dreamy”, “Cinematic”). | Use “seed” parameter for reproducibility. |
| Select Subject + Refine Edge | Isolate AI‑generated elements cleanly for compositing with existing photos. | Turn on Smart Radius for feathered edges. |
| Layer Masks + Gradient Masks | Blend multiple surreal layers by revealing transitions gradually. | Hold Alt and click mask thumbnail to view mask directly. |
| Glitch Filter (Custom Action) | Create a custom action: duplicate layer, apply Wave, Offset, and a Color Halftone with low radius, set blend to Linear Dodge. | Save as an Action for rapid reuse across projects. |
| Adjustment Layers (Hue/Saturation, Color Balance) | Fine‑tune the hue of each element to maintain a cohesive palette. | Use Clipping Mask to affect only the target layer. |
Safety note: Keep a Prompt Log—document the exact wording used in AI generators. This ensures reproducibility and helps you refine prompts faster.
4.3 Sample Project Walk‑Through
Scenario: A boutique record label wants an album cover titled “Astral Riddles” that melds cosmic imagery with vintage analog tape motifs.
- Prompt Generation – Open Adobe Firefly, type: “A retro magnetic tape spool floating in a nebula, fractal vines of light wrapping around it, hyper‑realistic, pastel color palette”. Generate 4 variations, select the one with the best composition.
- Import & Upscale – Bring the 4K AI image into Photoshop, apply Super‑Resolution (Neural Filter) to upscale to 8000 × 8000 px for print quality.
- Mask the Tape – Use Select Subject to isolate the tape spool, then refine edge to preserve the delicate foam around it.
- Add Astro Background – Import a high‑resolution Hubble‑style nebula, set blending mode to Overlay, reduce opacity to 45 %.
- Glitch Elements – Duplicate the tape layer, convert to Smart Object, apply Wave (Amplitude 10, Wavelength 20) and a Channel‑offset (Red +3 px, Blue –3 px). Set blend to Linear Light and opacity 30 %.
- Color Unification – Add a Color Lookup (Cinematic Warm) adjustment layer, clip it to all layers. Use Selective Color to dial back magenta in the nebula, giving a pastel cohesion.
- Typography – Choose a hand‑drawn serif for the album title, apply Layer Style → Outer Glow (soft pink, spread 150 %). Position the text to curve around the tape spool using Warp Text.
- Final Touches – Add a subtle vignette using a radial gradient mask, set to Multiply 20 % opacity.
- Export – 300 dpi PDF for print, and Web‑optimized JPEG (quality 85) for streaming platforms.
Result: A surreal, eye‑catching album cover that feels both futuristic and nostalgic—a perfect visual hook for music discovery platforms.
4.4 Who’s Using It? (Brands & Creators)
| Brand / Creator | Use‑Case | Platform |
| Billboard “Future of Advertising” Series | AI‑generated cityscapes in living‑room coffee tables; surreal, conversation‑starter pieces. | Physical installations, Instagram Stories |
| Band “Nebula Pulse” | Album cover and lyric video featuring AI‑enhanced surreal visuals. | Spotify, YouTube |
| Designer @KiraCrea | Daily “Prompt‑to‑Post” series—each day a fresh AI‑prompt turned into a polished Photoshop masterpiece. | TikTok, Behance |
| Adobe Creative Cloud Blog | Featured article “From Text Prompt to Finished Piece: A 30‑Minute Workflow” showcasing AI‑Surrealism pipeline. | Adobe blog, newsletter |
- Cross‑Trend Techniques: How to Blend Styles Seamlessly
While each trend stands strong on its own, the most compelling visual storytelling in 2024 often mixes elements from all three. Here’s how to do it without creating visual chaos:
- Establish a Dominant Mood First – Choose one style as the foundation (e.g., Cinematic Grunge) and layer supplementary elements (e.g., a hyper‑realistic 3‑D object) as accents.
- Use Unified Color Mapping – A global Gradient Map or Color Lookup ensures different visual languages share a common palette.
- Align Light Sources – Whether you’re working with a 3‑D object or an AI‑generated background, make sure all shadows and highlights stem from the same virtual light direction. This eliminates “floating” feelings.
- Maintain Consistent Grain/Noise – Apply a final “Film Grain” overlay on the entire composition. The grain unites disparate elements and adds the signature tactile feel users love.
- Leverage Smart Filters – Convert key layers to Smart Objects before applying filters (e.g., Blur, Glitch, Lens Flare) so you can adjust intensity later for balanced composition.
Pro workflow example:
- Start with a Cinematic Grunge base photograph (desaturated, grainy).
- Insert a hyper‑realistic 3‑D product (e.g., a watch) using Substance materials; match lighting to the base scene.
- Generate a surreal AI background (e.g., floating clouds of neon circuitry) and mask it into the composition’s negative space.
- Apply a global Gradient Map to push everything toward a teal‑orange duotone.
- Finish with a glitch overlay only on the AI portion to hint at the digital origin, keeping the 3‑D object crisp.
The result feels cohesive yet multidimensional—perfect for high‑impact branding or personal portfolio pieces that stand out in a crowded feed.
- Future‑Proofing Your Skill Set: Learning Pathways for 2025‑2026
| Skill | 2024‑2025 Resources | Why It Matters |
| Advanced 3‑D in Photoshop | Adobe Substance 3D Learning Hub, “3‑D Essentials for Photoshop” on LinkedIn Learning (2024 update). | 3‑D integration will become the default for product visualizations and AR assets. |
| Prompt Engineering for AI Art | Coursera “Prompt Design for Generative AI” (2024), prompts playbooks by PromptHero. | ChatGPT‑style models and Firefly will chase more nuanced concepts; precise prompting equals less re‑work. |
| Dynamic Masking & Roto‑scoping | “Masking Mastery” by Phlearn (2024), Masking in the Age of AI webinar series. | As compositing becomes more complex, mask precision remains a decisive skill. |
| Color Science & LUT Crafting | “Color Grading for Filmmakers & Photographers” by Lynda.com (2024). | Consistency across mixed-media projects (photo + 3‑D + AI) hinges on color harmony. |
| Creative Coding (JavaScript/Node for Photoshop) | Adobe’s ExtendScript docs, “Scriptable Photoshop” course on Udemy (2024). | Automating repetitive tasks (batch‑apply AI filters, generate variant assets) saves time and scales workflow. |
Take a quarterly skill audit: pick one new technique, build a small personal project, and then share it on a platform like Behance to get feedback. The faster you incorporate fresh tools, the more resilient your design practice will be when the next wave of Photoshop updates lands.
- Conclusion: The Takeaway for Designers, Marketers, and Hobbyists
The visual language of 2024 demonstrates a convergence: nostalgia meets futurism, analog grit marries digital polish, and AI serves as both a muse and a production engine.
- Cinematic Grunge satisfies the demand for authenticity and emotion‑laden storytelling.
- Hyper‑Realistic 3‑D Integration answers the consumer’s appetite for product realism and immersive experiences.
- AI‑Enhanced Surrealism pushes the envelope of imagination, letting creators conjure worlds that previously required weeks of manual work.
What should you do next?
- Audit your portfolio – Identify which of the three styles are under‑represented.
- Pick a trend and complete at least one comprehensive project (the walkthroughs above are perfect starting points).
- Document your process (screenshots, notes, prompt logs) and publish a case study. This not only solidifies your learning but also improves discoverability via SEO‑friendly keywords like Photoshop trends 2024, creative editing techniques, and digital art styles.
- Stay adaptable – The next year will likely introduce a fourth dominant aesthetic (perhaps AR‑Ready Mixed Media). Build a habit of weekly trend‑scouting on platforms like Dribbble, Behance, and AI prompt forums.
When you blend technical mastery with an eye for cultural relevance, your work won’t just look great—it will resonate. And in a world where every scroll is a decision point, that resonance is the ultimate competitive edge.
- Quick Reference Cheat‑Sheet
| Trend | Key Tools | Typical Uses | Recommended Settings |
| Cinematic Grunge | Curves, Camera Raw (Grain), Gradient Map, Overlay textures | Music posters, fashion lookbooks, editorial spreads | Grain 20, Split Toning (Shadows teal, Highlights amber), Vignette 15 % |
| Hyper‑Realistic 3‑D Integration | 3‑D Workspace, Substance 3D assets, HDRI lighting, Ray‑traced render | Product ads, tech showcases, packaging mock‑ups | Global Illumination On, Roughness 0.1‑0.15, Contact Shadows 25 % |
| AI‑Enhanced Surrealism | Adobe Firefly (text‑to‑image), Neural Filters, Glitch action, Select Subject | Album covers, experimental branding, digital fine art | Super‑Resolution 4×, Prompt Seed saved, Glitch Action Opacity 30 % |
- Disclaimer
The information in this article is provided for educational and informational purposes only. While every effort has been made to ensure the accuracy of the techniques, tools, and trends described, Photoshop software updates, third‑party plug‑ins, and AI model capabilities can change rapidly. The author and publisher are not liable for any losses, damages, or misinterpretations that may arise from the application of the content herein.
Affiliate Disclosure: Some links and resource recommendations may be part of affiliate programs that provide a modest commission at no additional cost to you. This helps support the creation of free, high‑quality content.
Ready to level up your Photoshop game? Grab your favorite coffee, fire up Photoshop, and start experimenting with the styles that are shaping visual culture this year.
Stay inspired, stay sharp, and keep creating.
Keywords: Photoshop trends 2024, creative editing techniques, digital art styles
Hashtags: #PhotoshopTrends #DigitalArt #CreativeEditing










Leave a comment